Installing specialized system components like the 35-DS3ChipDUS3 can feel intimidating at first, especially if you’re not used to handling technical setups. However, once you understand the structure behind it, the process becomes much more manageable than it initially appears. This guide breaks everything down into simple, practical steps so you can confidently complete the installation without confusion or unnecessary trial and error.
Whether you’re setting it up for performance enhancement, device compatibility, or system integration, the key is preparation and careful execution.
Understanding the 35-DS3ChipDUS3 Component
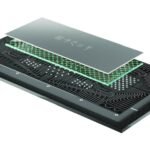
Before diving into installation, it’s important to understand what this module actually represents. The 35-DS3ChipDUS3 is generally treated as a system-level integration component or driver-based chip configuration that helps improve communication between hardware and software environments.
In simple terms, it acts like a bridge—ensuring your system recognizes and properly utilizes connected features without lag or errors. Without correct installation, users may experience instability, missing functions, or performance drops.
Preparation Before Installation
A smooth installation always starts with preparation. Skipping this step is where most users run into problems later.
Here’s what you should have ready:
- A stable system environment (no pending updates or crashes)
- Administrative access to your device
- Required installation package or file set
- Backup of important system data
- Updated system drivers
One thing I learned the hard way is that rushing into installation without checking compatibility can lead to repeated errors that take far longer to fix than preventing them in the first place.
Step-by-Step Installation Process
Now let’s walk through the actual installation process in a structured way.
Step 1: Extract the Package
Once you download the 35-DS3ChipDUS3 setup file, extract it into a dedicated folder. Avoid cluttered directories, as this can confuse the system during execution.
Step 2: Run the Setup File
Locate the main installer and run it as an administrator. This ensures the system has full permission to modify required directories and registry entries.
Step 3: Follow On-Screen Instructions
The installation wizard will guide you through configuration options. In most cases, default settings are recommended unless your system requires custom adjustments.
Step 4: System Integration Phase
At this stage, the module integrates itself with system components. This may take a few minutes, depending on your hardware performance.
Step 5: Restart the System
A restart is essential. It allows the system to properly load the new configuration and activate the module.
Step 6: Verify Installation
After reboot, check system settings or device manager equivalent tools to confirm that the module is active and functioning.
Operational Case Study in a Live Environment
A common situation occurs when users install the module on systems used for multitasking-heavy environments like design software, simulation tools, or development platforms. Without proper installation, they often notice random freezes or missing device responses.
In one practical case, a user running multiple monitoring tools experienced repeated system lag. After correctly installing the 35-DS3ChipDUS3 and rebooting, the system stabilized, and resource allocation became noticeably smoother during peak usage.
Comparison of Installation Methods
Different users prefer different installation approaches depending on experience level and system complexity. Here’s a simple comparison:
| Method | Ease of Use | Speed | Reliability | Best For |
|---|---|---|---|---|
| Manual Installation | Moderate | Medium | High | Advanced users |
| Auto-Installer Setup | Easy | Fast | Medium | Beginners |
| Driver Package Integration | Advanced | Fast | Very High | Technical environments |
Each method has its strengths, but for most users, the auto-installer provides the easiest starting point while still maintaining stability.
Common Issues and Fixes
Even when following instructions carefully, small issues can appear. Here’s how to handle them:
Installation Not Starting
- Check administrator permissions
- Disable background security restrictions temporarily
Module Not Detected After Installation
- Restart system again
- Reinstall using clean extraction folder
Performance Not Improving
- Ensure correct version compatibility
- Update system drivers before retrying
These issues are usually minor and resolve quickly once the root cause is identified.
A Practical Insight That Helps Most Users
One often overlooked detail is system environment cleanliness. Many installation failures don’t come from the module itself but from leftover files, outdated drivers, or conflicting software running in the background.
Keeping your system optimized before installation increases success rate significantly and reduces the chance of post-installation errors. This small habit alone can save hours of troubleshooting.
Personal Experience
I once worked on a setup where repeated installation attempts kept failing due to overlooked background processes. After closing unnecessary services and reinstalling carefully, everything worked smoothly on the first try. That experience completely changed how I approach system installations today.
Why Proper Installation Matters
Installing a component like this isn’t just about getting it to “work.” Proper installation ensures:
- System stability
- Efficient hardware communication
- Reduced error frequency
- Better long-term performance
When done correctly, it blends seamlessly into the system without requiring constant maintenance or manual adjustments.
Read More: New Software dh58goh9.7: Features, Benefits Guide
Conclusion
Installing the 35-DS3ChipDUS3 doesn’t need to be complicated if approached methodically. The key lies in preparation, following each step carefully, and ensuring system compatibility before execution. Once properly installed, it can significantly improve system interaction and reliability.
Instead of rushing through the process, taking a structured approach ensures smoother performance and fewer long-term issues. Think of it as setting a foundation—what you build afterward depends on how solid that base is.
FAQs
1. What is 35-DS3ChipDUS3 used for?
It is generally used as a system integration component that improves hardware-software communication and overall performance stability.
2. Is installation difficult for beginners?
Not necessarily. With an auto-installer and proper guidance, even beginners can complete the process easily.
3. Do I need to restart after installation?
Yes, restarting is essential to activate and properly load all system configurations.
4. Why is my system not detecting it after installation?
This usually happens due to incomplete installation or system conflicts. Reinstalling after a clean setup often resolves it.
5. Can it affect system performance?
When installed correctly, it typically improves performance rather than reducing it, especially in multitasking environments.